A brand mascot does something a logo alone usually cannot: it gives people a face to remember. Toy brands, DTC snacks, beauty labels, and kids’ products all use characters on custom boxes to stand out on crowded shelves and in unboxing videos.
But a character that looks great on screen can look flat or off-color on a printed box. The gap between a good character design and a good printed character comes down to manufacturing decisions: box style, printing method, artwork files, and the proof you approve before production.
This guide walks through each decision from a manufacturer’s point of view, so your factory files print the way you expect.
Why Characters Work on Packaging
A character gives your packaging a focal point. Shoppers scan shelves in seconds, and a well-placed face or figure reads faster than a block of text. For kids’ products, characters do the selling directly. For adult categories — coffee, skincare, pet treats — a mascot softens the brand and makes it feel less generic.
There is also a practical repeat-purchase effect: consistent characters make your product recognizable across product lines and limited editions. A customer who recognizes the character recognizes the brand, even when the box color changes.
The rest of this guide is about making that recognition survive the printing process.
Choosing the Right Box Style for Character Artwork
Not every box structure shows off a character equally well. The box style decides how much flat, uninterrupted print area your artwork gets — and flat area is what characters need.
| Box Style | Character Display Area | Best For |
|---|---|---|
| Folding carton (tuck-end) | Large front panel; lid tucks can interrupt art | Retail boxes for cosmetics, food, toys |
| Rigid box (lid-and-base or magnetic) | Largest uninterrupted panels; premium feel | Gift sets, high-value products, PR kits |
| Mailer box (self-locking) | Big top lid panel; interior print possible | DTC/ecommerce unboxing experiences |
| Corrugated shipping box | Coarse print surface; limited detail | Outer shipping only — not ideal for fine character art |
Folding cartons are the workhorse for character packaging. The front panel is one flat surface, and both straight tuck end and reverse tuck end structures keep the character visible on the shelf. On coated paperboard, fine lines and small details reproduce cleanly.
Rigid boxes give characters the most premium treatment. Panels are large, flat, and rigid, so full-bleed character scenes print cleanly and hold their shape on display. The trade-off is cost — rigid boxes involve more handwork, so plan accordingly.
Mailer boxes shine when the unboxing is part of the marketing. A character printed on the inside lid — revealed when the customer opens the box — photographs well and gets shared. If your brand plays in social commerce, read our guide on designing mailer boxes that get shared.
Corrugated shipping boxes are generally the wrong canvas for detailed character art. The fluted surface softens fine lines, and most outer shippers print in one or two colors. Use them for a simple logo or pattern, and put the character on the inner retail box instead.
Printing Methods Compared: Offset vs Digital
Character artwork — with its gradients, shading, and fine outlines — is demanding to print. The two main methods for custom boxes handle it very differently.
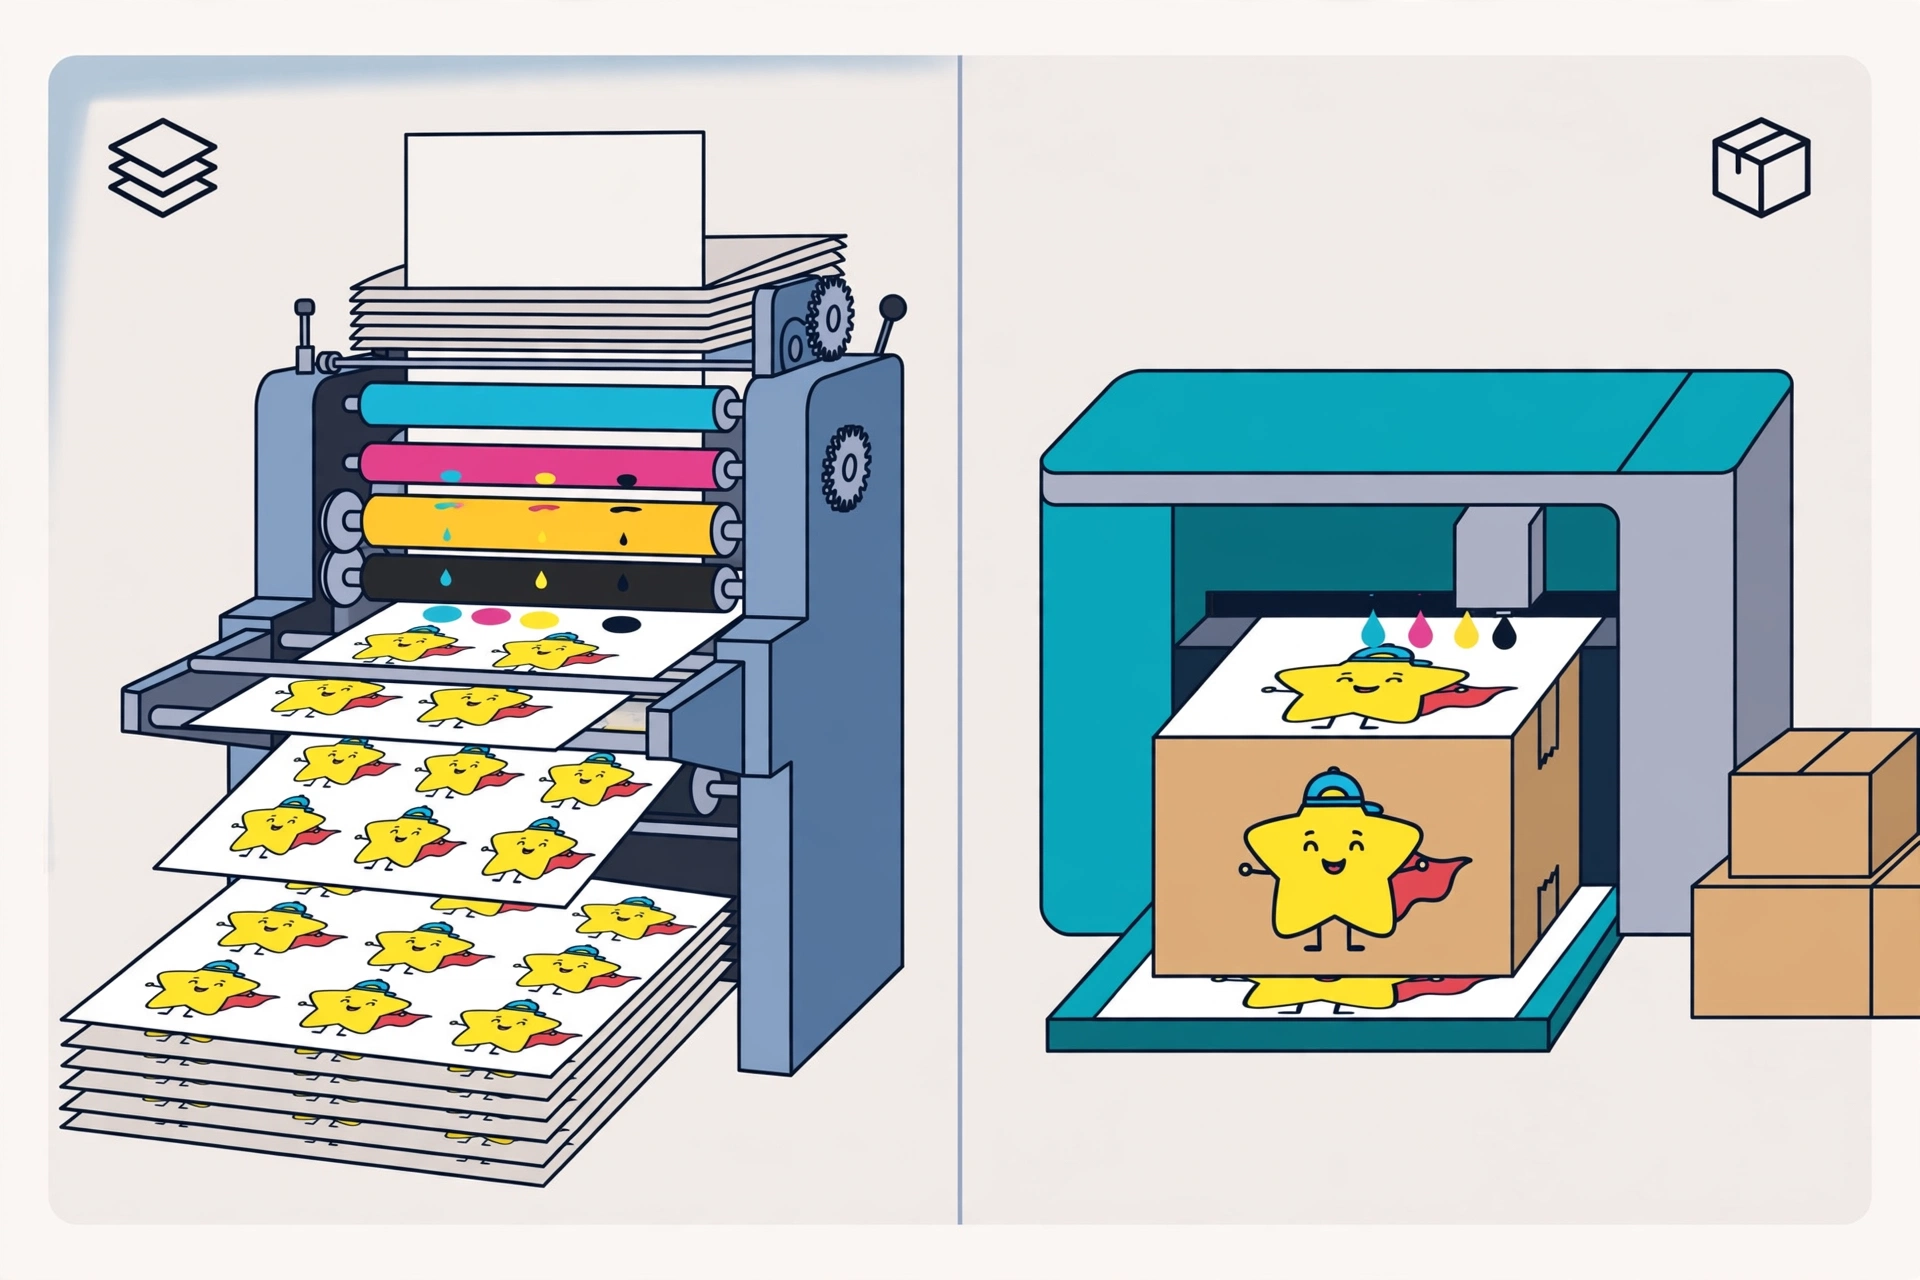
| Offset Printing | Digital Printing | |
|---|---|---|
| Color quality | Excellent; smooth gradients, precise PMS matching | Very good; slight banding possible in large gradient areas |
| Fine detail | Handles hairline strokes and small text cleanly | Good, but tiny details can soften at high speed |
| Cost structure | Plates + setup cost, then low per-unit cost | No plates; higher per-unit cost |
| Best order size | Medium to larger runs | Smaller runs and test batches |
| Color matching | Pantone spot colors available for exact brand colors | Primarily CMYK; brand colors matched as close as process allows — capabilities vary by press and supplier |
| Turnaround | Longer (plates + makeready) | Faster (files go straight to press) |
Choose offset when your character has exact brand colors that must match across every production run. Pantone spot colors on an offset press, used alongside approved physical references, can improve consistency across reorders — keeping a specific mascot red or teal closer to the approved standard batch after batch. Offset is also the right call for large runs, where the per-unit cost drops well below digital.
Choose digital when you are testing a new character, running a limited edition, or ordering a small batch. No plate costs mean you can print a small batch with full-color character art without the setup investment. The limitation: many digital packaging workflows rely primarily on CMYK, and capabilities vary by press and supplier — so if your character’s signature color falls outside the CMYK gamut, expect a close-but-not-exact match.
One practical tip: if your character art uses heavy gradients or glow effects, ask for a printed proof. Screens lie about gradients; only a physical print shows banding or color shifts.
Artwork Prep: What Your Manufacturer Needs
Most character printing problems are file problems. Here is exactly what to prepare before you send anything to your factory.
1. Vector files, not just PNGs
Supply character artwork as vector files (AI, EPS, or PDF with vectors preserved). Raster images (PNG, JPG) are acceptable only at high resolution — 300 DPI at actual print size, minimum. A character pulled from a website at 72 DPI will print pixelated, no matter how good the press is.
2. Work on the dieline, not a blank canvas
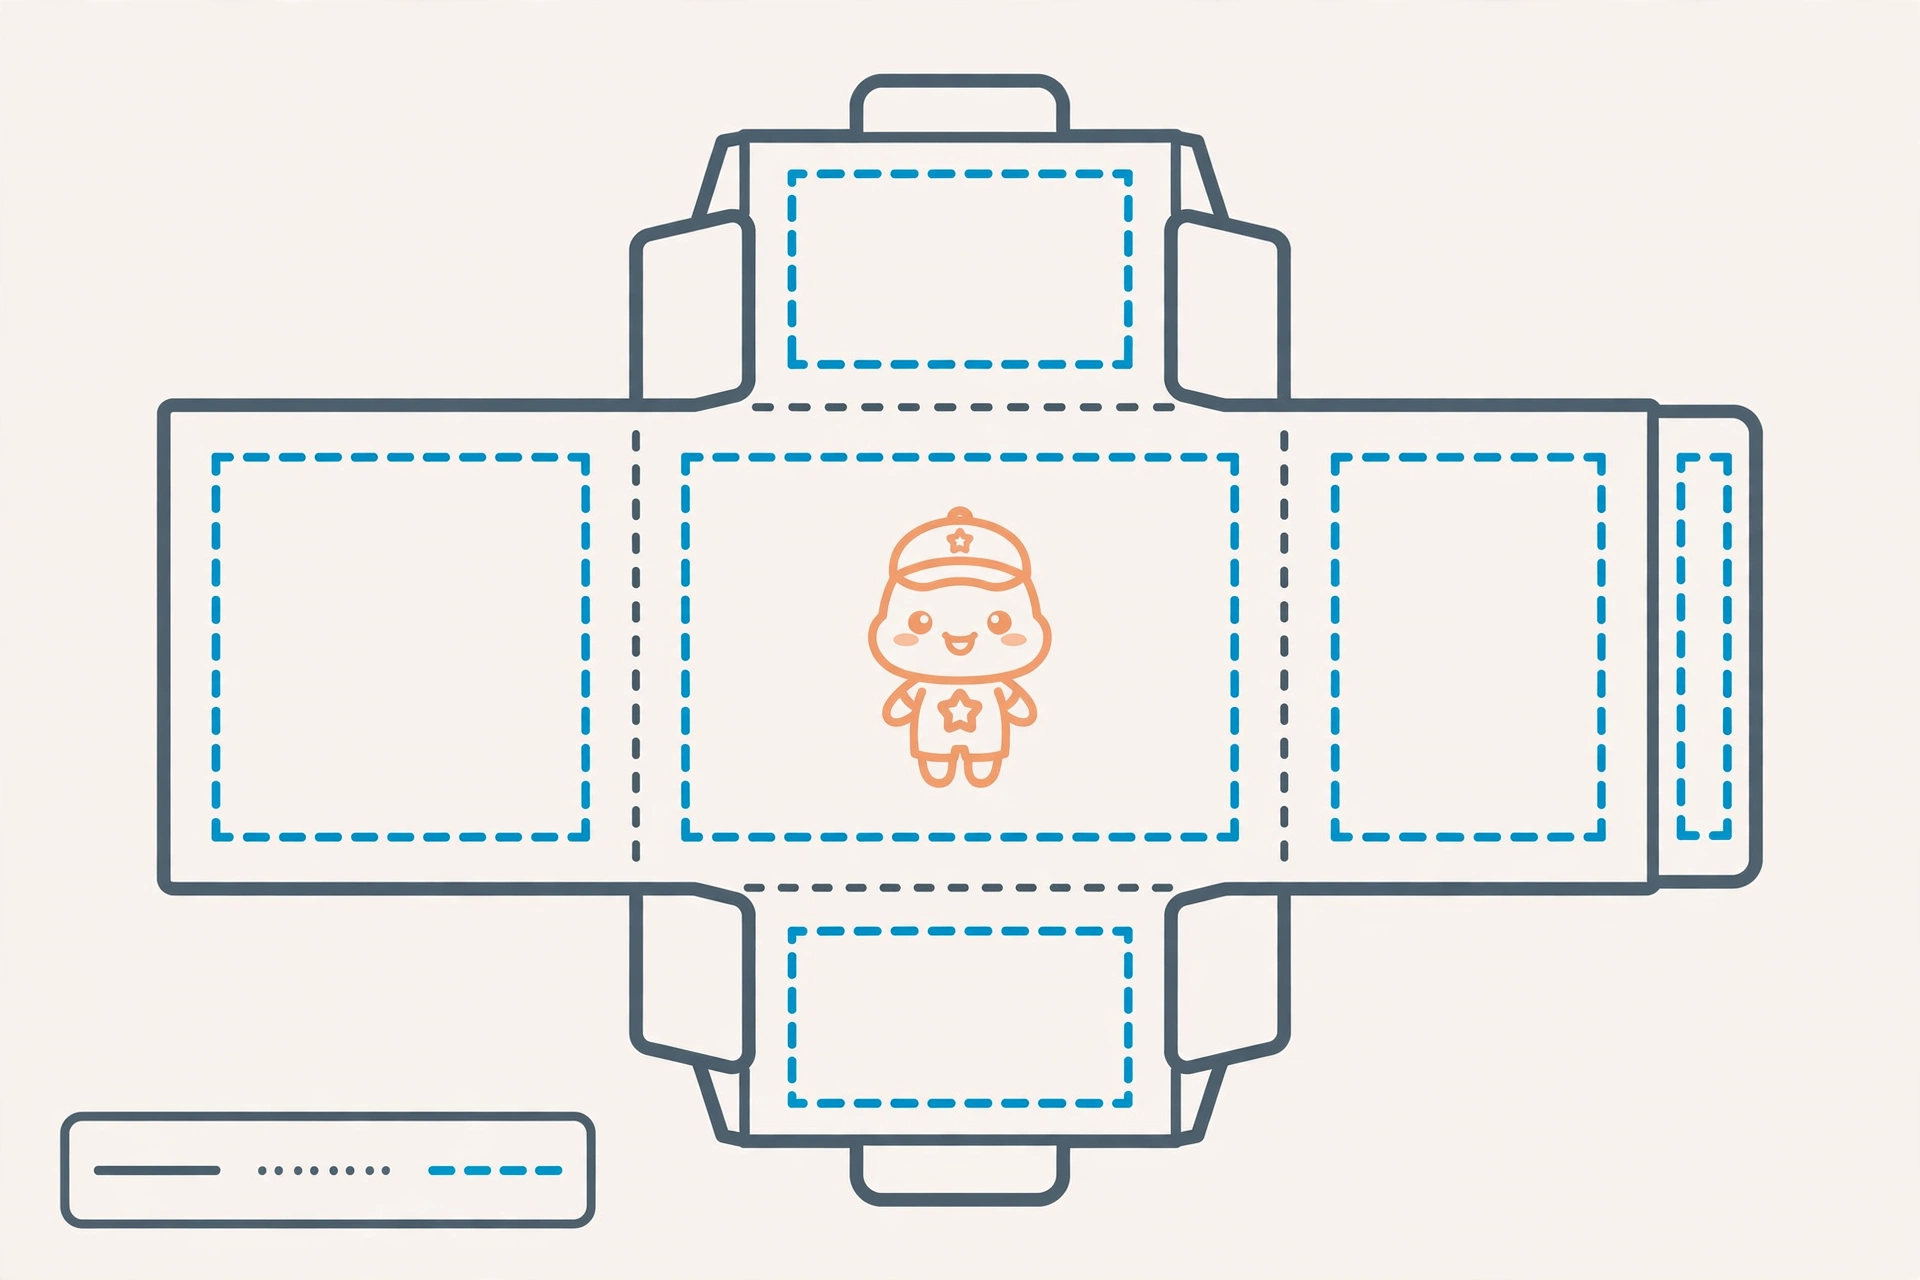
Ask your manufacturer for the dieline of your exact box structure and size before your designer starts. The dieline shows fold lines, glue flaps, and bleed areas. Character art placed without a dieline frequently ends up with an eye on a fold line or a face split across a glue flap.
3. Respect safe zones
Keep critical character elements — faces, eyes, text — at least 3–5 mm inside every cut and fold line (confirm the exact margin with your manufacturer). Anything closer risks being trimmed or folded in production.
4. Use CMYK, and flag brand colors
Convert all artwork to CMYK before sending. If your character has official brand colors, provide Pantone references alongside the files so the factory can match them on an offset run.
5. Confirm you own the rights
This one is legal, not technical, but manufacturers will ask: make sure you own the character or hold a license to print it. Factories generally will not print third-party IP without written authorization.
6. Choose paper weight deliberately
Character art with rich colors needs a paper that holds ink well. For folding cartons, the typical range is 250–400 gsm coated paperboard; heavier board gives a sturdier feel but costs more. Our paper GSM chart breaks down which weights suit which box types.
Placement & Design Tips for Character Art
Where the character sits on the box matters as much as how it prints.
- Front and center for retail. On a shelf, the front panel does the work. Give the character the largest panel and keep competing elements (claims, badges, text) to the sides.
- Inside lid for unboxing. On mailer boxes, an interior character print turns the opening moment into shareable content.
- Scale for distance. A character that reads at arm’s length on a shelf needs bolder shapes and higher contrast than one viewed up close in someone’s hands. Test this with a printed mockup, not on screen.
- Keep one hero. One character, clearly dominant, beats three characters competing for attention. Secondary characters work as pattern fills or side-panel details.
- Mind the folds. On tuck-end boxes, the top and bottom flaps fold over — do not place the character’s face where a flap will cover or crease it. Check the dieline.
Finishing Touches That Make Characters Pop
Printing lays down the color; finishing gives the character dimension. These are the finishes manufacturers apply after printing:
- Matte vs gloss lamination. Gloss makes colors look richer and more saturated — good for playful, high-energy characters. Matte gives a softer, premium feel that suits minimalist or luxury-adjacent mascots.
- Spot UV. A clear glossy coating applied only to the character (or its eyes, or a key detail) makes it catch the light while the rest of the box stays matte. One of the most cost-effective ways to make a character stand out.
- Foil stamping. Gold or holographic foil on a character detail — a crown, a star, a badge — reads as premium instantly. Use sparingly; foil on the whole character usually looks cheaper than foil on an accent.
- Embossing. A raised character outline adds a tactile element that photographs well. Works best on rigid boxes and heavier paperboard.
Discuss finishing during the quotation stage, not after artwork is finalized — some finishes affect how the underlying art should be prepared (spot UV and foil both need separate mask files).
Sampling: What to Check on the Proof
Never approve bulk production from a screen rendering. Order a physical sample and check these character-specific points:
- Color accuracy. Compare the printed character against your Pantone references under natural light, not just office fluorescents.
- Gradient smoothness. Look for banding in shaded areas, especially on digital proofs.
- Fine detail. Check small outlines, facial features, and any text inside the artwork closely.
- Registration. On offset samples, make sure multi-color character edges align — misregistration shows as color fringing.
- Fold and glue areas. Fold the sample into a finished box and confirm no critical character element lands on a crease or under a glue flap.
- Finishing alignment. If you ordered spot UV or foil, verify the mask aligns with the printed character underneath.
For guidance on which type of proof to order, see our breakdown of which packaging sample to order before bulk production. Typical sampling takes 3–7 days; use that window to check everything above carefully — it is far cheaper than reprinting a full run.
Cost & MOQ Realities
Character packaging does not have to mean premium pricing, but a few cost realities help you plan:
- Plate and setup costs apply to offset runs regardless of design — the character itself does not add plate cost versus any other full-color design. One design, one set of plates.
- More colors = more cost on offset. A character using 4 spot colors costs more in plates and makeready than a CMYK-only design. Simplify the palette where brand guidelines allow.
- Finishing adds per-unit cost. Spot UV, foil, and embossing each add a process step. Budget for them as line items, not afterthoughts.
- Size ranges, not fixed prices. Box cost depends on structure, size, paper, print colors, finishing, and quantity — any quote without those inputs is a guess. Typical production is 15–20 days after sample approval; air freight adds roughly 7–10 days if you are on a deadline.
- Start with a blank structural sample. Before committing to printed samples, confirm the box structure and size with a blank sample — these are typically provided free of charge, with the buyer covering courier fees.
FAQ
Can I print a licensed character (e.g., from a cartoon or game) on my boxes?
Only if you hold the license. Manufacturers will generally ask for written authorization before printing third-party intellectual property. Sort out licensing before you request a quote.
What file format should character artwork be in?
Vector formats (AI, EPS, or vector PDF) are the standard. If any element is raster, it must be 300 DPI at final print size. Always build the artwork on the manufacturer’s dieline, in CMYK, with Pantone references for brand colors.
Will my character colors match exactly on every reorder?
An exact match on every reorder cannot be guaranteed. Pantone references and approved proofs improve consistency, but minor variation between runs is normal in printing. Offset runs with Pantone spot colors generally track the approved standard more closely than digital runs — many digital packaging workflows rely primarily on CMYK, and capabilities vary by press and supplier. Keep a printed reference sample from your first run to compare future orders against.
Is digital or offset better for launching a new mascot?
Digital is usually the smarter start: no plate costs, faster turnaround, and you can test the character on a small batch first. Once the design is proven and volumes grow, switch to offset for better unit economics and exact color matching.
How long does it take from artwork approval to finished boxes?
As a typical range: sampling 3–7 days, bulk production 15–20 days after you approve the sample, and air freight roughly 7–10 days. Plan backward from your launch date and add buffer for artwork revisions — artwork may need a few rounds of adjustments.
Ready to Put Your Character on the Box?
A mascot is only as good as its execution. Send us your character artwork (AI, EPS, or PDF), your box style and size, the quantity you have in mind, and your destination country — we will advise on the right printing method, paper, and finishing for your character, and quote accordingly.
Get a quote for your character packaging — or request a free blank structural sample (courier at your cost) to confirm box structure before we print a single character.